


First things first! American Touch Up will always mix the color of paint to the code you provide. But to verify the code you sent us and to make sure you got sent your order you’ll always want to test the paint before applying to your vehicle. We try our hardest to have 100% guarantee that you get the code you ordered, if you do see the wrong color please call us and we will fix this issue immediately while verifying your paint code!
Testing the Color Match
ALWAYS test the paint before applying it to your vehicle you are responsible for making sure the paint matches by testing the color BEFORE you apply it to your vehicle! If the color is off, the clearcoat or primer WILL NOT HELP to make the color match better! If you apply the paint to your vehicle and it doesn’t match, you will have to wash it off with automotive lacquer thinner or worse, if you allow it to thoroughly dry, you will have to sand it off.
SPECIAL NOTE: American Touch Up can get a perfect color match, to the paint code you provided. THIS DOES NOT MEAN IT’S GOING TO BE A PERFECT MATCH TO YOUR SPECIFIC VEHICLE. Paint fades, which means sometimes you will not get a perfect match. Conditions can affect the color of paint when it’s dried as well, temperature, humidity and the way you spray the paint can all affect the final outcome. This is why blending is so important. You must trick the eye into thinking it’s all the same color. Many are surprised that certain panels on your car are actually different variations of color, meaning your bumper could be a different color than your hood. You just might not be able to notice or never paid attention. This is because parts can be sprayed in different parts of the world with much different conditions. Please do not leave negative feedback if you have this issue, give us a call and we will help you learn the blending process.
Use an approved automotive paint respirator and WEAR safety goggles and gloves when handling automotive paint to protect your eyes and skin!! Please read the information below for best results.
When spraying, always test for paint compatibility. Paint an inconspicuous part of the vehicle, let dry and see if there is any reaction.
Non-metal surface Make sure you use SEM Adhesion Promoter if you are spraying a non-metal surface. Failure to do so will result in the paint peeling off within a few months! Make sure you spray the adhesion promoter BEFORE you apply the primer layer.
There will be two nozzles. A standard white nozzle (larger one) and an adjustable one to produce different patterns.
Quick Steps-Spray Cans
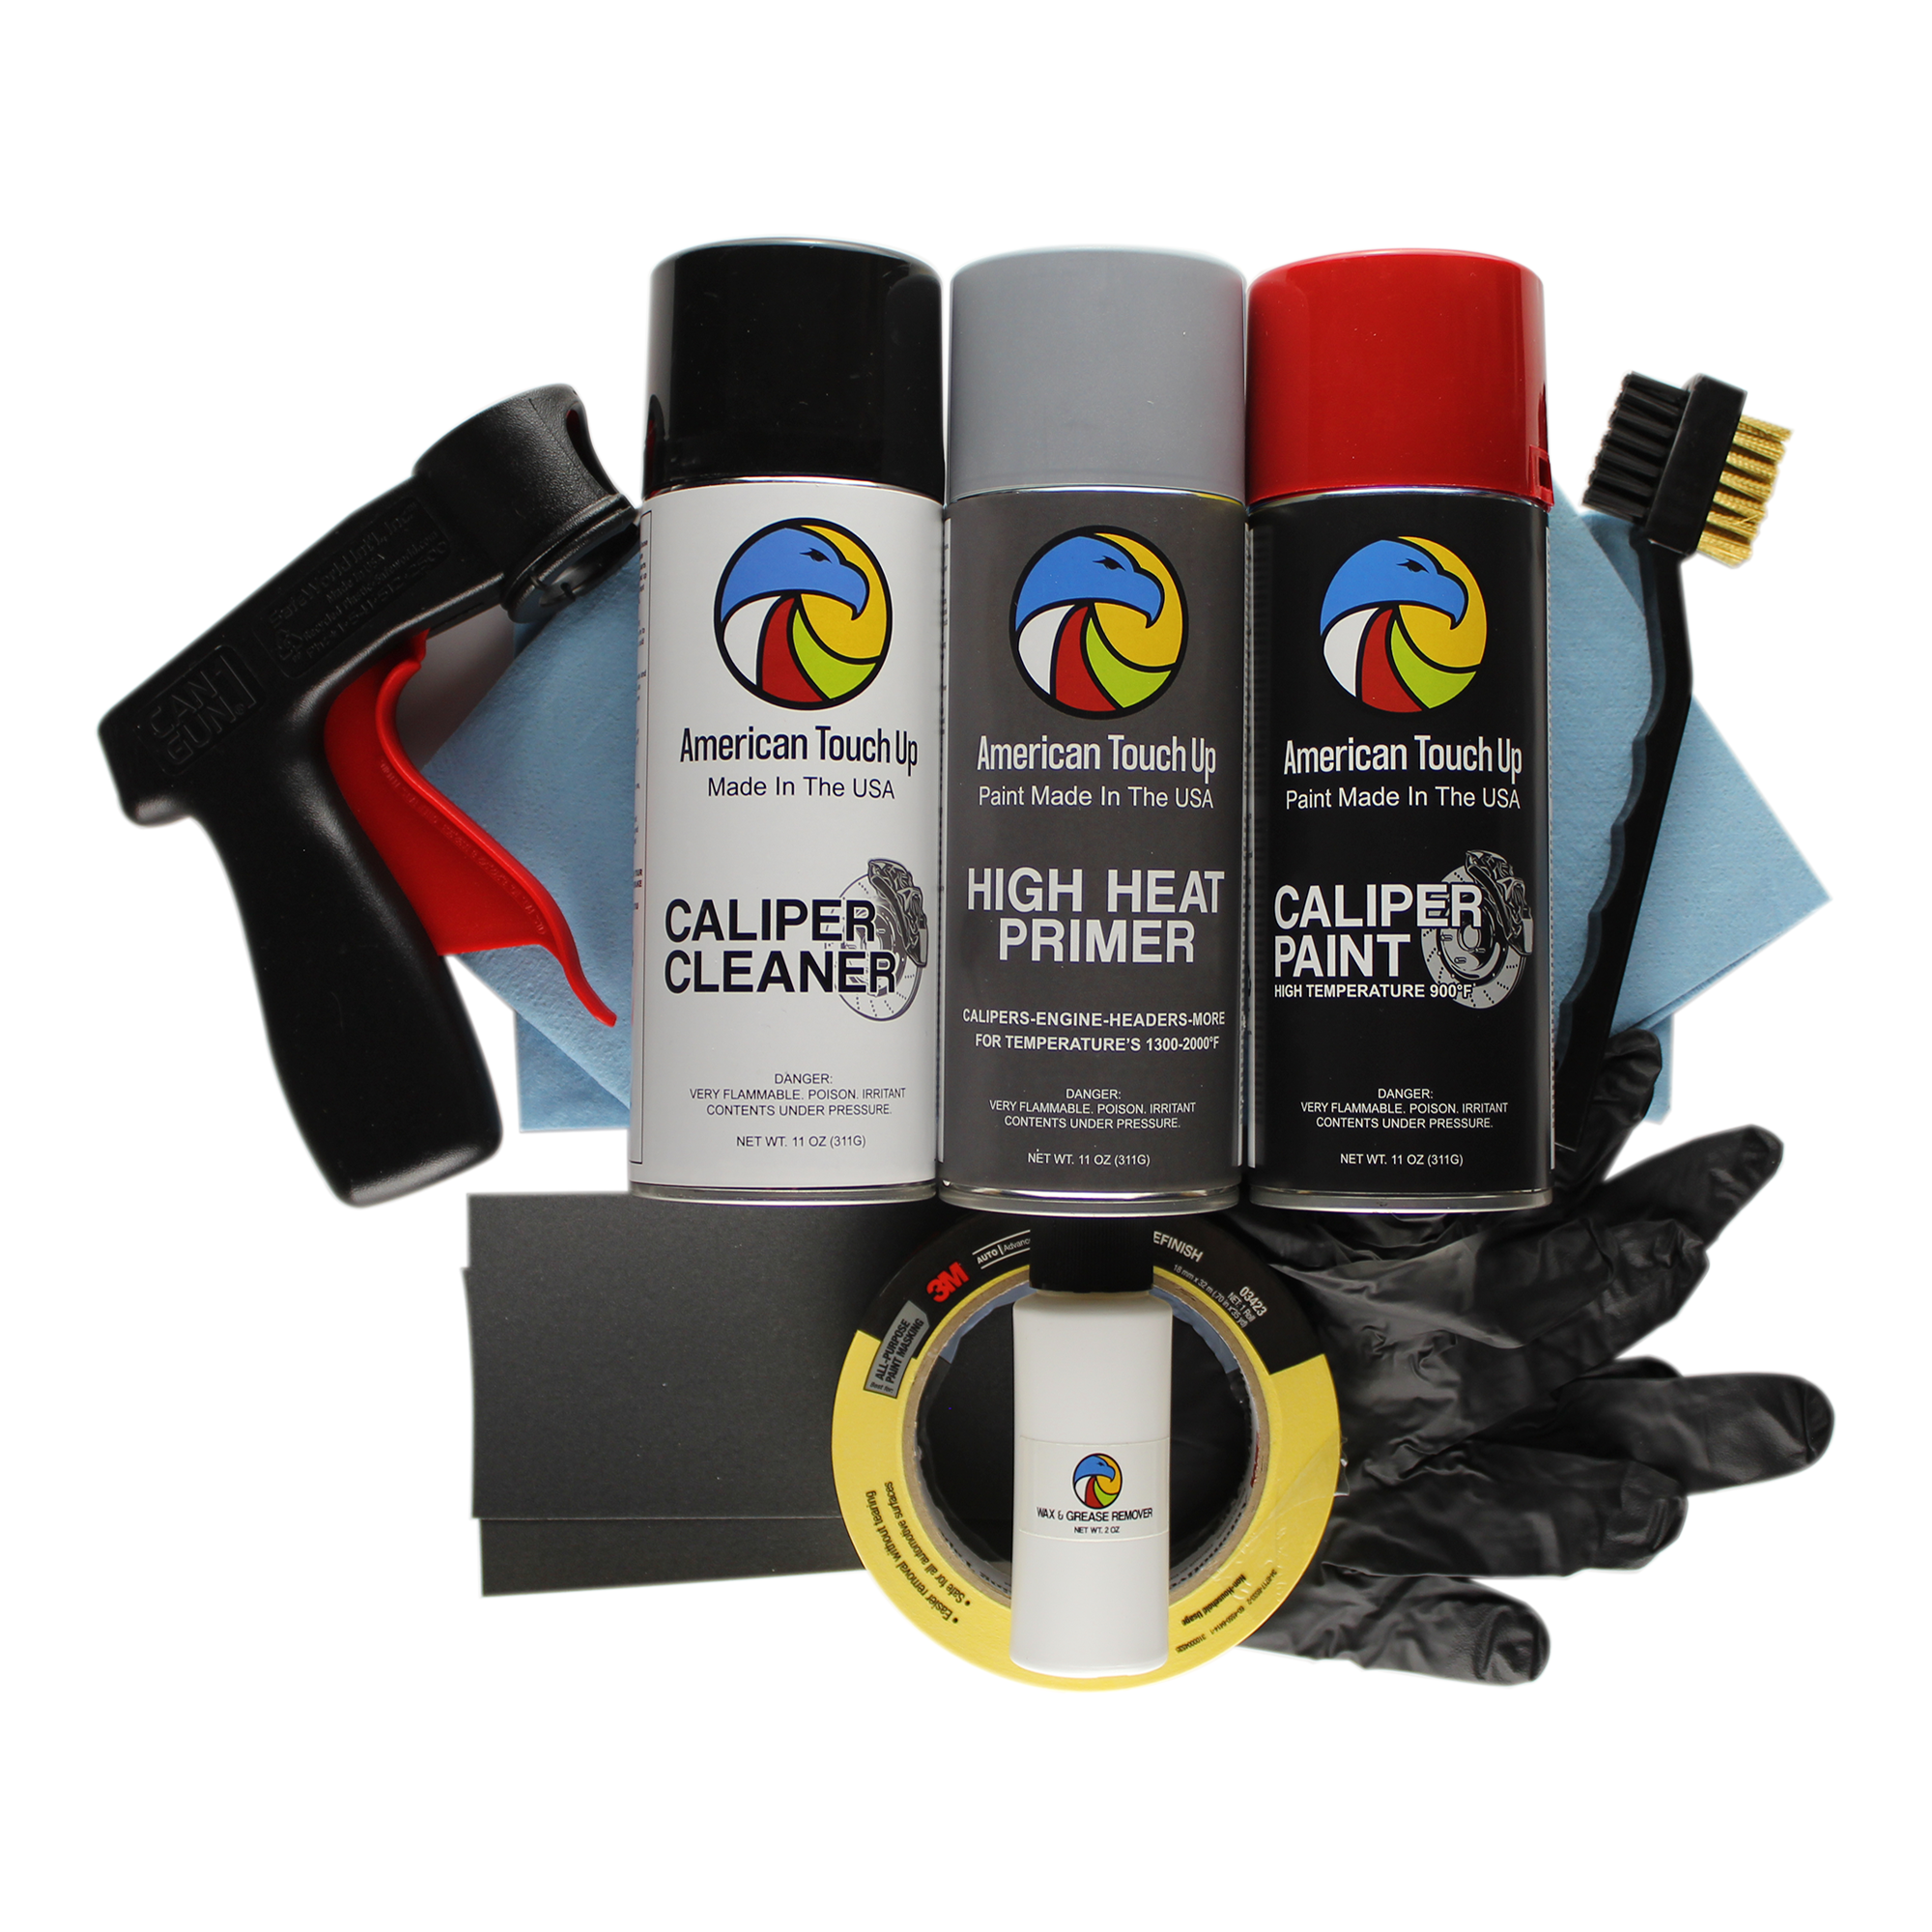
1) Clean the area (soap and water or wax and grease remover).
2) Scuff the area well with wet and dry sandpaper.
3) Check humidity (below 50%) and temperature (around 70°F).
4) Spray even wet coats of basecoat. You can sand the paint between coats, but don’t sand the final coat. Two wet coats should be sufficient. Allow each coat to dry 20 minutes before recoating. Some colors require more paint.
5) The basecoat should be dry to the touch before applying the clearcoat. Spray the clearcoat beyond the basecoat to a good stopping point such as the edge of the panel. Two wet coats should be sufficient.
6) Let the clearcoat dry for at least three days. Use Rubbing Compound (apply with clean soft cotton only, paper products or dirty fabrics will scratch your paint surface) to smooth and shine the area. Always test the rubbing compound on your vehicle in an inconspicuous place to check for surface compatibility and shine. Without this step, the paint will not shine properly.
7) If this is your first time, try one small area from start to finish before repairing other areas.
Problems: Paint will not shine.
Important! Temperature Warning
Make sure the temperature is at least 50°F but around 70°F is ideal. The paint can dry very quickly in warm weather (above 70 degrees). The whole point behind practicing is to see how
quickly the basecoat, (midcoat if you are doing a tri coat) and clearcoat will dry. Normally we recommend letting the paint dry overnight at each step, but often you can do all the steps within an hour. Do not practice on your vehicle!
Spray Nozzles
Do not use spray nozzles from another spray can! Swapping nozzles can puncture the plunger system and cause damage making the can unusable.
Paint Compatibility Warning
If you have had your vehicle painted at Maaco, Earl Schieb or any other inexpensive paint shop within the last two years, our paint will lift your paint. If in doubt, you can paint a small inconspicuous part of the car and check for lifting.
Spray Can Information
All spray cans are 1 2 ounces and provide excellent coverage of about four square feet (with two wet coats) so you can estimate how many cans you will need by measuring the square footage of the area you are painting. Blending the paint into adjacent panels will achieve a much nicer and less noticeable repair especially for metallic paints. The most important thing to remember is to not spray heavy coats. Do not apply so little paint that it dries as you apply it as this creates dry spots. Spray in a dust free area. Again, practice AWAY from your vehicle!
Clean and Protect the Area
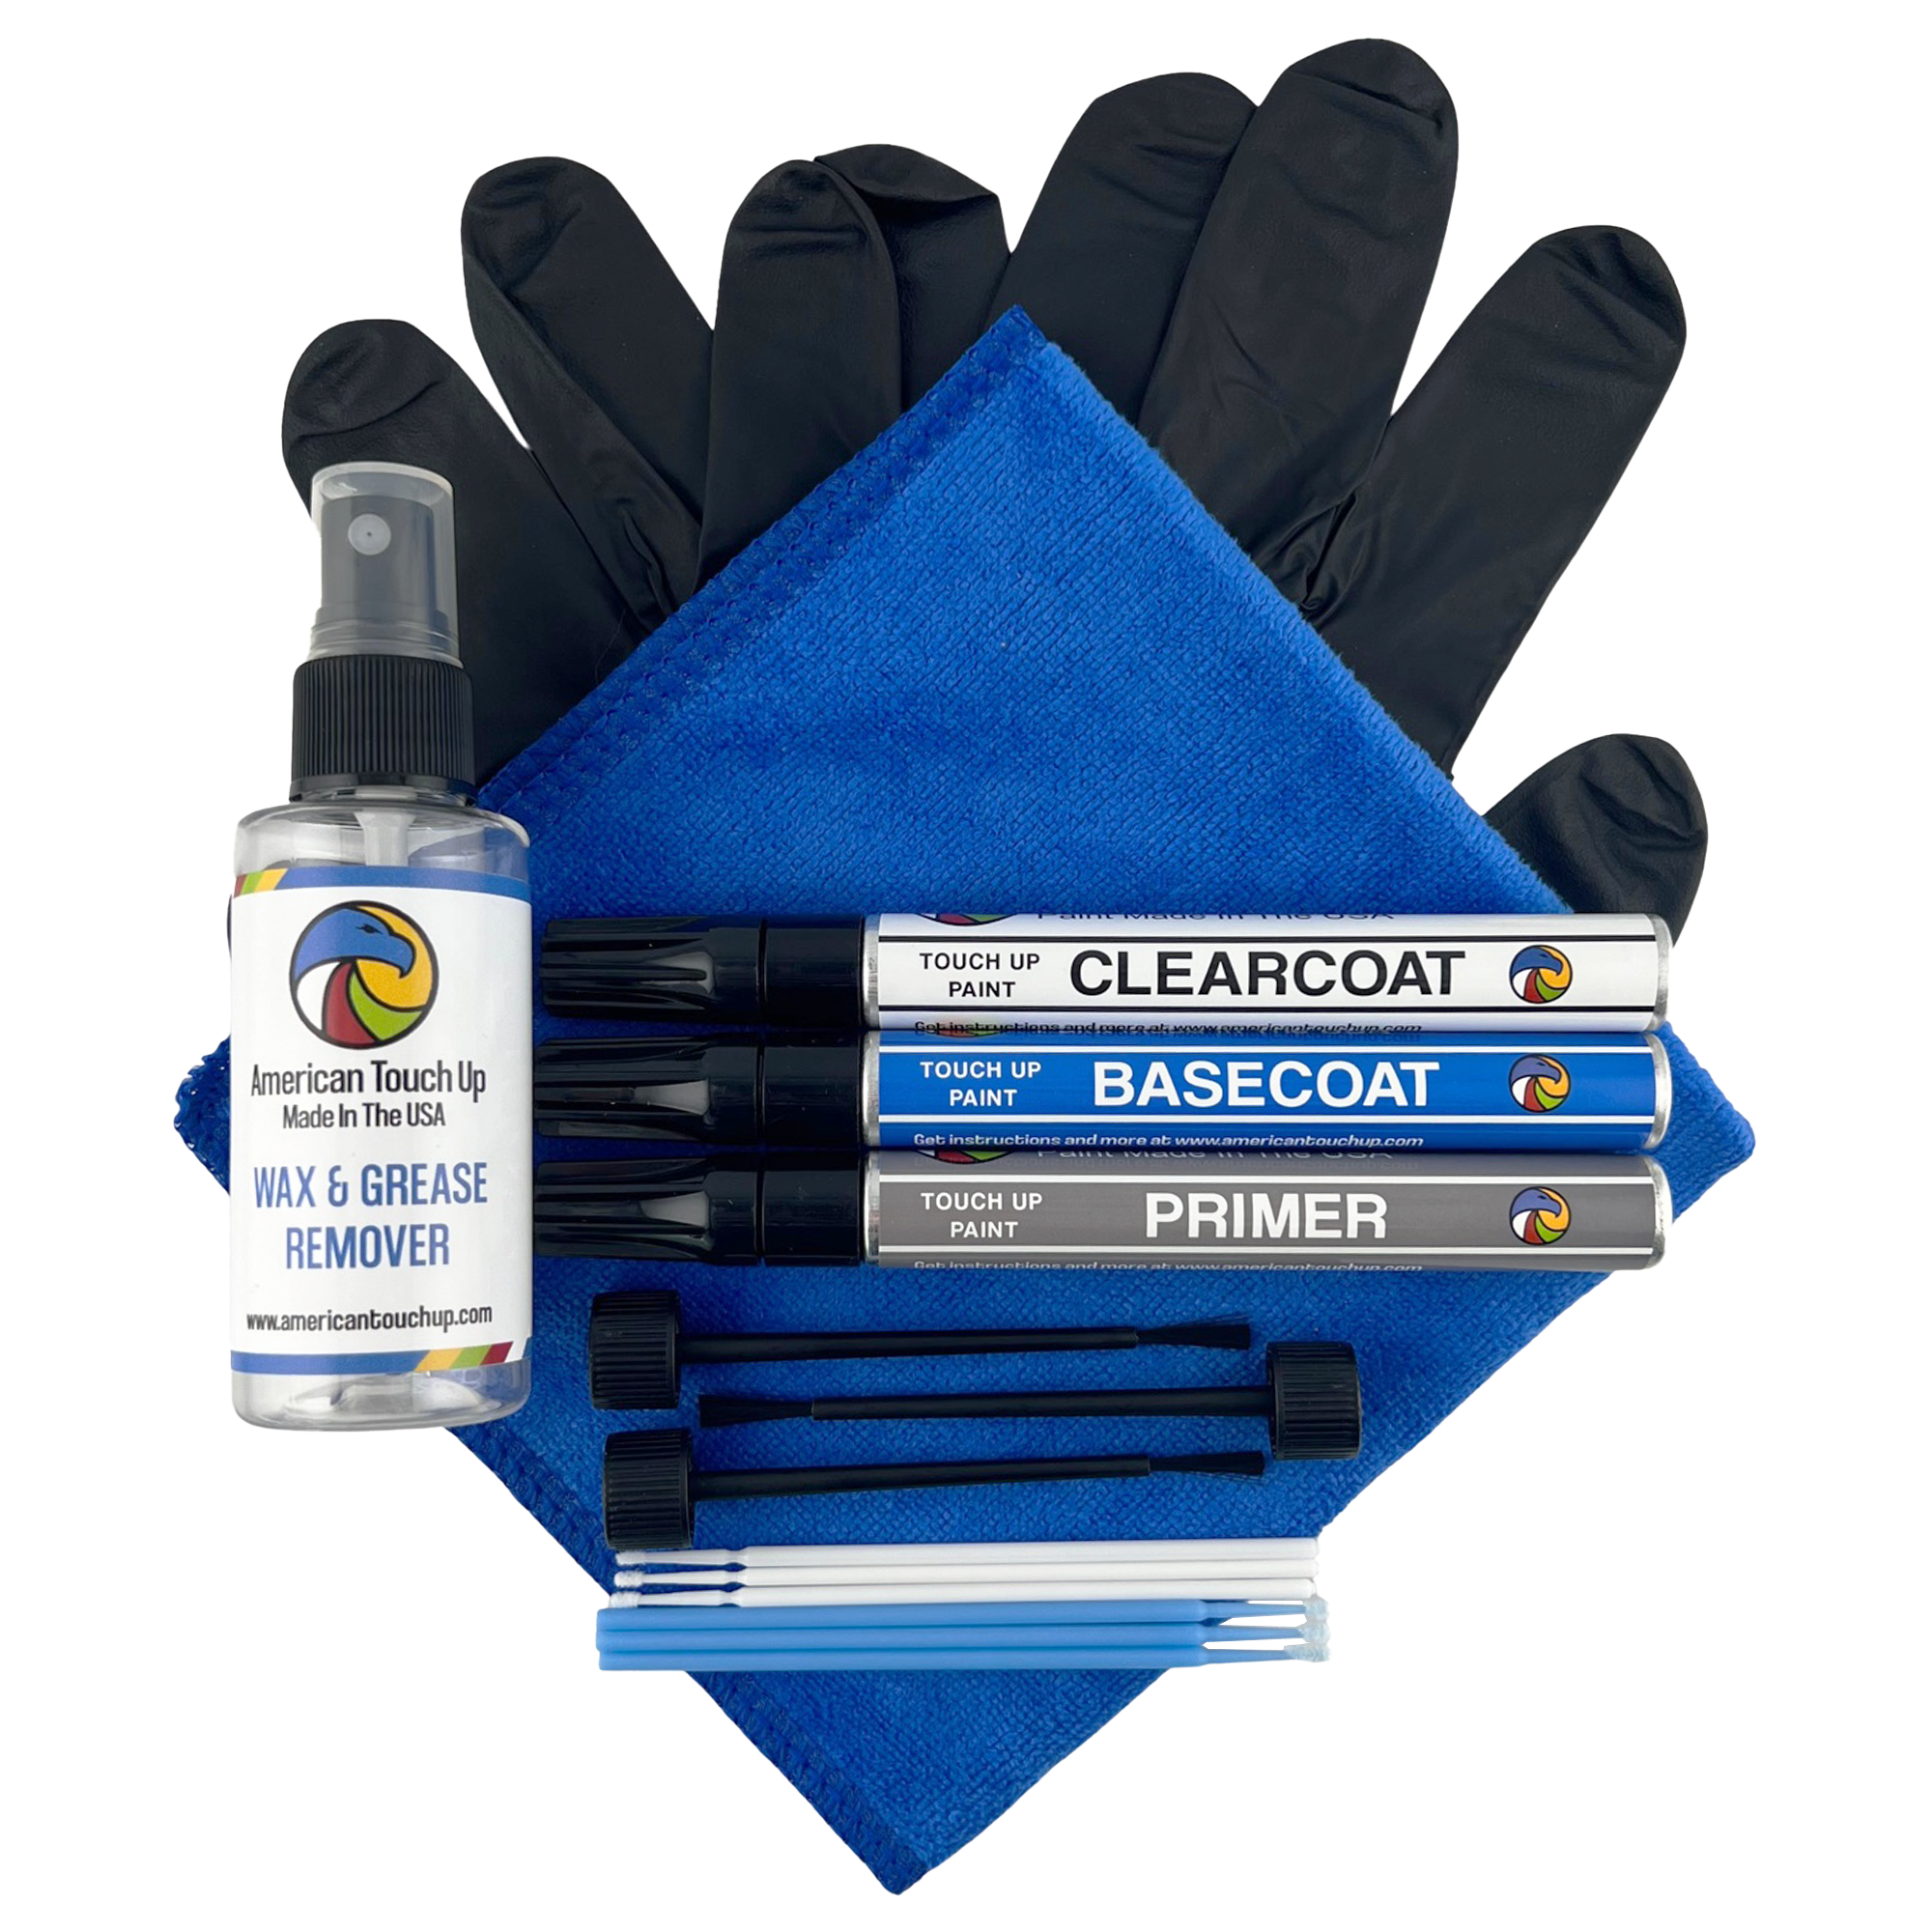
Wash the area with soap and water, then use a wax and grease remover or equivalent product
(some painters have suggested tar and insect remover, available at the supermarket) before starting the project. You may wish to use masking tape (automotive quality only!) all around the scratch or chipped area to prevent accidentally marring the surface.
Paint Spraying-Humidity and Temperature Warning!
Make sure you do not spray in wet or humid conditions! Test the humidity, spray some of the clearcoat and see how it dries. If it dries with a whitish haze or streaks, it’s too humid to paint! Spray paint should be applied when the temperature is at least 70 °F and the humidity is below 50%.
Rust
The first thing to determine is if the scratch has started to rust. We are talking about a surface scratch and not rust that is bubbling up beneath the paint, as this is too far-gone for touch-up paint! If the area is rusty, you should take a little extra effort to remove all traces of rust using 220 grit sandpaper or a wire brush. Follow this with One Step Rust Converter (spray)(sold”on our site) and apply this to the bare metal. After applying the rust converter, you may need to use body filler or lacquer putty (both sold on our site) to smooth the area. Apply primer over the area. Be careful you do not sand off the rust converter.
Sanding
Clean the area as described above then sand the area you wish to spray with #600 grit sandpaper.
Spraying a panel such as a door, you must decide how far you are going to paint and scuff the entire area. See below for additional information
Adhesion Promoter
Make sure you use Adhesion Promoter if you are spraying a non-metal surface. Failure to do so will result in the paint peeling off within a few months! After the area has been
sanded smooth, apply a layer of Adhesion Promoter to the entire surface you will be painting (including where you will be applying clearcoat). Follow this layer with primer,
basecoat and clearcoat. The adhesion promoter will help with proper adhesion of the paint layers. Again, it must be sprayed BEFORE you apply primer.
Primer
If you have an unpainted surface, either bare metal, plastic, rubber, etc., APPLY PRIMER! Primer is made to stick to unpainted surfaces and paint is designed to stick to
Primer! Professional automotive painters use primer on all jobs. DO NOT USE ENAMEL PRIMER. You can spray primer over unpainted surfaces, existing paint (as long as you have sanded the paint) and over body filler. Use primer to cover small imperfections and to build up scratched areas to a smooth surface. For deeper scratches, we recommend a product called lacquer putty available at most auto parts stores. The putty is applied in several thin coats to slowly build up the surface. Use a final coat of primer over the putty. Primer has a tendency to shrink so let it dry according to the manufacturer’s instructions and apply several coats to achieve a smooth surface. You can let it dry overnight.
Paint Spraying-Technique
Tape surrounding areas to protect against over spray. Use a tack rag to pick up any foreign matter on the vehicle. Spray even, overlapping coats. The painted area should be evenly wet with no dry spots. You can sand out imperfections later. Let the basecoat dry for approximately 20 minutes and then apply a second coat. Let the basecoat dry overnight and wet sand the area using 1000 wet and dry sandpaper to sand out imperfections, dust, etc. Spray a final coat of paint over the area but do not sand it. Let the paint dry thoroughly before applying clearcoat. Usually if you let the paint dry overnight, it will be dry. However, in temperatures less than 70℉, it can take much longer. For best results, metallic paints should be blended into the surrounding area.
Paint Spraying-Paint to an edge
After you have painted the repaired area, slowly feather the paint out on either side of the repaired area. Professional shops will often paint to a boundary such as the edge of a door, a panel line on your car, a molding, etc. The idea is not to leave a paint line right in the middle of a panel
Watch for Drips!
You are spraying the final coat and suddenly a big drip falls from the can right in the center of your work! Don’t try to wipe it off, you will make the situation worse. The best thing to do is is let it dry and wet sand the drip away and re-coat the area. Some of our customers have reported wrapping the spray can with a rag to catch any unforeseen drips. This even happens to professional painters so just be aware of it and check the nozzle and can for excess paint build up.
Note on Spraying Metallic Paints
If you apply too much paint to the surface or do not wait long enough between coats, the metallic flakes in the paint will become uneven. The final coat of metallic paint should be sprayed farther away from the surface to let the metallic flakes go on as evenly as possible. This distance will depend on your paint color, temperature, humidity, etc. so be sure to practice off the vehicle first!
Spraying the Clearcoat
The basecoat should be dry to the touch before applying the clearcoat. Shake the clearcoat before spraying for two minutes. Spray the clear over the paint. Do not spray the clearcoat in the sun. Do not spray a part that has been heated by the sun. Let it cool down first, as otherwise the clearcoat will dry with a dull finish. Let the clearcoat dry thoroughly. If you let the clearcoat dry overnight, it will be dry. However, in temperatures less than 70 degrees, it can take much longer. If necessary, wet sand out any imperfections with 1000 grit, then apply a final coat of clear. Let the clearcoat dry for at least three days and then use automotive rubbing compound to smooth and shine the area.
Spraying the Clearcoat-Technique
You would typically spray the clearcoat farther out than the paint to a boundary line on your vehicle. Again, you don’t want to spray the clearcoat in the middle of a panel without going out to the edges as you will leave a noticeable clearcoat line.
Lightening/Darkening the Paint when Spraying Clearcoat
By adjusting the distance you spray from the surface, you can make the clearcoat lighten or darken the paint. To lighten the paint, hold the spray can farther away. Holding the can closer will darken the paint. This will take a bit of practice and does not always work with some paint colors. Practice spraying OFF your car first to see how the technique works.
Using the Rubbing Compound
The application of Rubbing compound creates the deep gloss in the clearcoat so don’t skip this step!
Let the clearcoat dry for at least three days before using the rubbing compound. Do not use a heavy duty rubbing compound as it will dull the surface. Also, do not use polishing compound as this is not the same as rubbing compound. Use a medium duty rubbing compound like will be offering on our website very soon.
Use a clean, soft cloth, like an old tee shirt (for example DO NOT USE PAPER PRODUCTS as the wood fibers will scratch the paint!). We provide high quality shop towels for this purpose! Place a small quantity of rubbing compound on the vehicle and use circular strokes and apply even pressure to the vehicle. It’s almost like waxing a vehicle except the rubbing compound is like an extremely fine liquid sandpaper. Buff with a clean cloth to a high gloss. (You may want to spray some paint and clearcoat on a smooth surface and practice to get the feel of it.) Sometimes lots of pressure is required to make the clearcoat shine, The rubhinoa compound can also be applied by machine, but be careful, it’s very easy to burn the finish! You can get the same results by hand, it will just take a bit longer.
Problems
Poor or no shine
1) You may not have applied enough clearcoat. IF you have gone through the clearcoat, you will end up polishing the basecoat which will not shine! Solution – apply more clearcoat and compound the area again.
2) You are using polishing compound or heavy duty rubbing compound. The polishing compound will do nothing for the paint and the heavy duty compound will dull the finish.
Solution – use a medium duty rubbing compound. You may have to apply more clearcoat
3) You may have such a large area that trying to compound by hand is just too difficult.
Solution – Use a power buffer or hire a detail shop to compound the area. See the warning above about using a power buffer.
4) You have used paper cloth, have a dirty cloth, are using a terry cloth towel or a cloth with grit in it. Solution – Use an old clean t-shirt!
5) You didn’t apply any clearcoat! Don’t laugh. But this has been a common problem. The basecoat will not shine no matter how much rubbing compound you apply. Solution – Apply Clearcoat!!!!
6) You have a whitish haze or white streaks through the clear. This is caused by high humidity conditions. Solution – Wait until the humidity is under 50%. Scuff down the clearcoat, apply more color coats and reapply the clear.
7) You have spider veins through the paint. This is caused by either spraying the paint too far away or the temperature is too hot and the paint is drying before it hits the surface. Solution –
Apply the paint closer to the surface and do not paint when the temperature is above 80 degrees.
The rubbing compound is also good for removing oxidation from your finish. Let the paint dry for a 30 days and apply a good quality automotive wax.
Hazards and Safety-VERY IMPORTANT! PLEASE READ!!
Automotive touch-up paint including primer and clearcoats are EXTREMELY hazardous. Keep away from children! Call a physician IMMEDIATELY if swallowed. Keep out of direct sunlight and heat over 120F. DO NOT STORE IN CAR and avoid freezing. Contains HAZARDOUS Waste. EPA requires proper disposal. Use with adequate ventilation. If you experience any dizziness, discontinue product use immediately and call physician. This product contains chemicals known to the state of California to cause birth defects, cancer and other health problems. The main thing here is to use the product with adequate ventilation. Use an approved automotive paint respirator and WEAR safety goggles when handling automotive paint to protect your eyes!! This includes the primer, paint and clearcoat.
Tri-Coats
Any color that has the word “Tri-coat” in the color description will need three different steps to achieve the correct color.
SPECIAL NOTE: American Touch Up can get a perfect color match, to the paint code you provided. THIS DOES NOT MEAN IT’S GOING TO BE A PERFECT MATCH TO YOUR SPECIFIC VEHICLE. Paint fades, which means sometimes you will not get a perfect match. Conditions can affect the color of paint when it’s dried as well, temperature, humidity and the way you spray the paint can all affect the final outcome. This is why blending is so important. You must trick the eye into thinking it’s all the same color. Many are surprised that certain panels on your car are actually different variations of color, meaning your bumper could be a different color than your hood. You just might not be able to notice or never paid attention. This is because parts can be sprayed in different parts of the world with much different conditions. Please do not leave negative feedback if you have this issue, give us a call and we will help you learn the blending process.
Application
First apply the basecoat. This is the main color coat. Make sure this has thoroughly dried for at least a few hours. Next, apply the midcoat layer. This bottle (or spray can) will have a check by the word Tricoat (or Midcoat) or a #2 on the label to identify it. This color goes on very thinly and you must practice a bit to get it right. Finally, you apply the clearcoat to achieve the correct color.
When spraying tricoats, apply basecoat first. Spray the midcoat out even farther than the basecoat or you will create a paint layer line. The best way to spray tri coats is to spray the entire panel to the edge so there are no paint layer lines. Again, practice, practice, practice off the vehicle first before applying a tri coat to your vehicle!
Waxing
Allow the paint to dry 30 days before waxing.
Lightening/Darkening the paint when spraying clearcoat
By adjusting the distance you spray from the surface, you can make the clearcoat lighten or darken the paint. To lighten the paint, hold the spray gun farther away. Holding the gun closer will darken the paint. This will take a bit of practice and does not always work with some paint colors. Practice spraying on something other than your car first to see how the technique works.
Electro Deposit Primer (EDP) EDP Stands for Electro Deposit Primer, Original paint jobs from the 1960 era did not do an adequate job of coating the metal surface and protecting against corrosion. EDP is electrically applied similar to a plating process. This provides excellent rust resistance and completely covers all the metal. To prepare this primer for paint, light scruff the surface.